Background

Pages

Tuesday, August 31, 2010

Pancake Day Layout


I love my Helmar tape runner!!! Just used it to assemble this gorgeous layout. Notice the Cosmo Cricut Early Bird papers that I WON a few months ago! They were soooo super generous in their prize pack! I love the papers so much that I was kind of afraid to cut into them, LOL! But lately I've been trying to actually USE my stash... You might think that means use what I have before buying more but I'm not that strong yet... The three patterned papers I used are called Farmer's Market, Ribbon Sandwich and Sunrise. I used my Old West Cricut Cartridge to cut out the title.


You may have noticed this GORGEOUS flower near my title. I bought it from Precocious Paper a GREAT shop on Etsy. The owner, Tessa, makes all kinds of beautiful flowers that can be used in scrapbooks, on cards, to make headbands... what ever you can think to stick a flower on! Take a minute to browse her shop and you will be drooling! This particular flower actually didn't have the brown cardstock in it but it felt like it needed a little extra color to anchor it with all the pattern on my page. So I pulled it apart and added the cardstock and I am so happy with the results! I feel a little strange because there is NO ribbons or buttons added to this one but I didn't want to overpower it!

Making this layout has made me hungry for pancakes! Luckily, the Park Forest Pancake Day is coming up quickly, September 25th, and I will be able to enjoy another great meal with family and hopefully see a few friends too!

Thursday, August 26, 2010

Halloween Layouts and BLOG CANDY!

So I've been in the Halloween mood lately. It always seems to hit me about mid-August, the urge to decorate my house for Halloween... Thanks to scrapbooking I can play with my Halloween pictures and supplies without the neighbors thinking I'm some sort of freak (although I know there are a few who'd probably love to get their Halloween stuff out now too)! The photos from all three of these layouts are from Halloween 2008.


For this first layout I cut the title with the new Cricut Happy Hauntings cartridge. I am IN LOVE with this cartridge!!! There are soooo many great images and the phrases and font are awesome. Best of all, I've already made the 3D house and it is super cute! I still need to add some decoration to it so I will post it closer to Halloween.

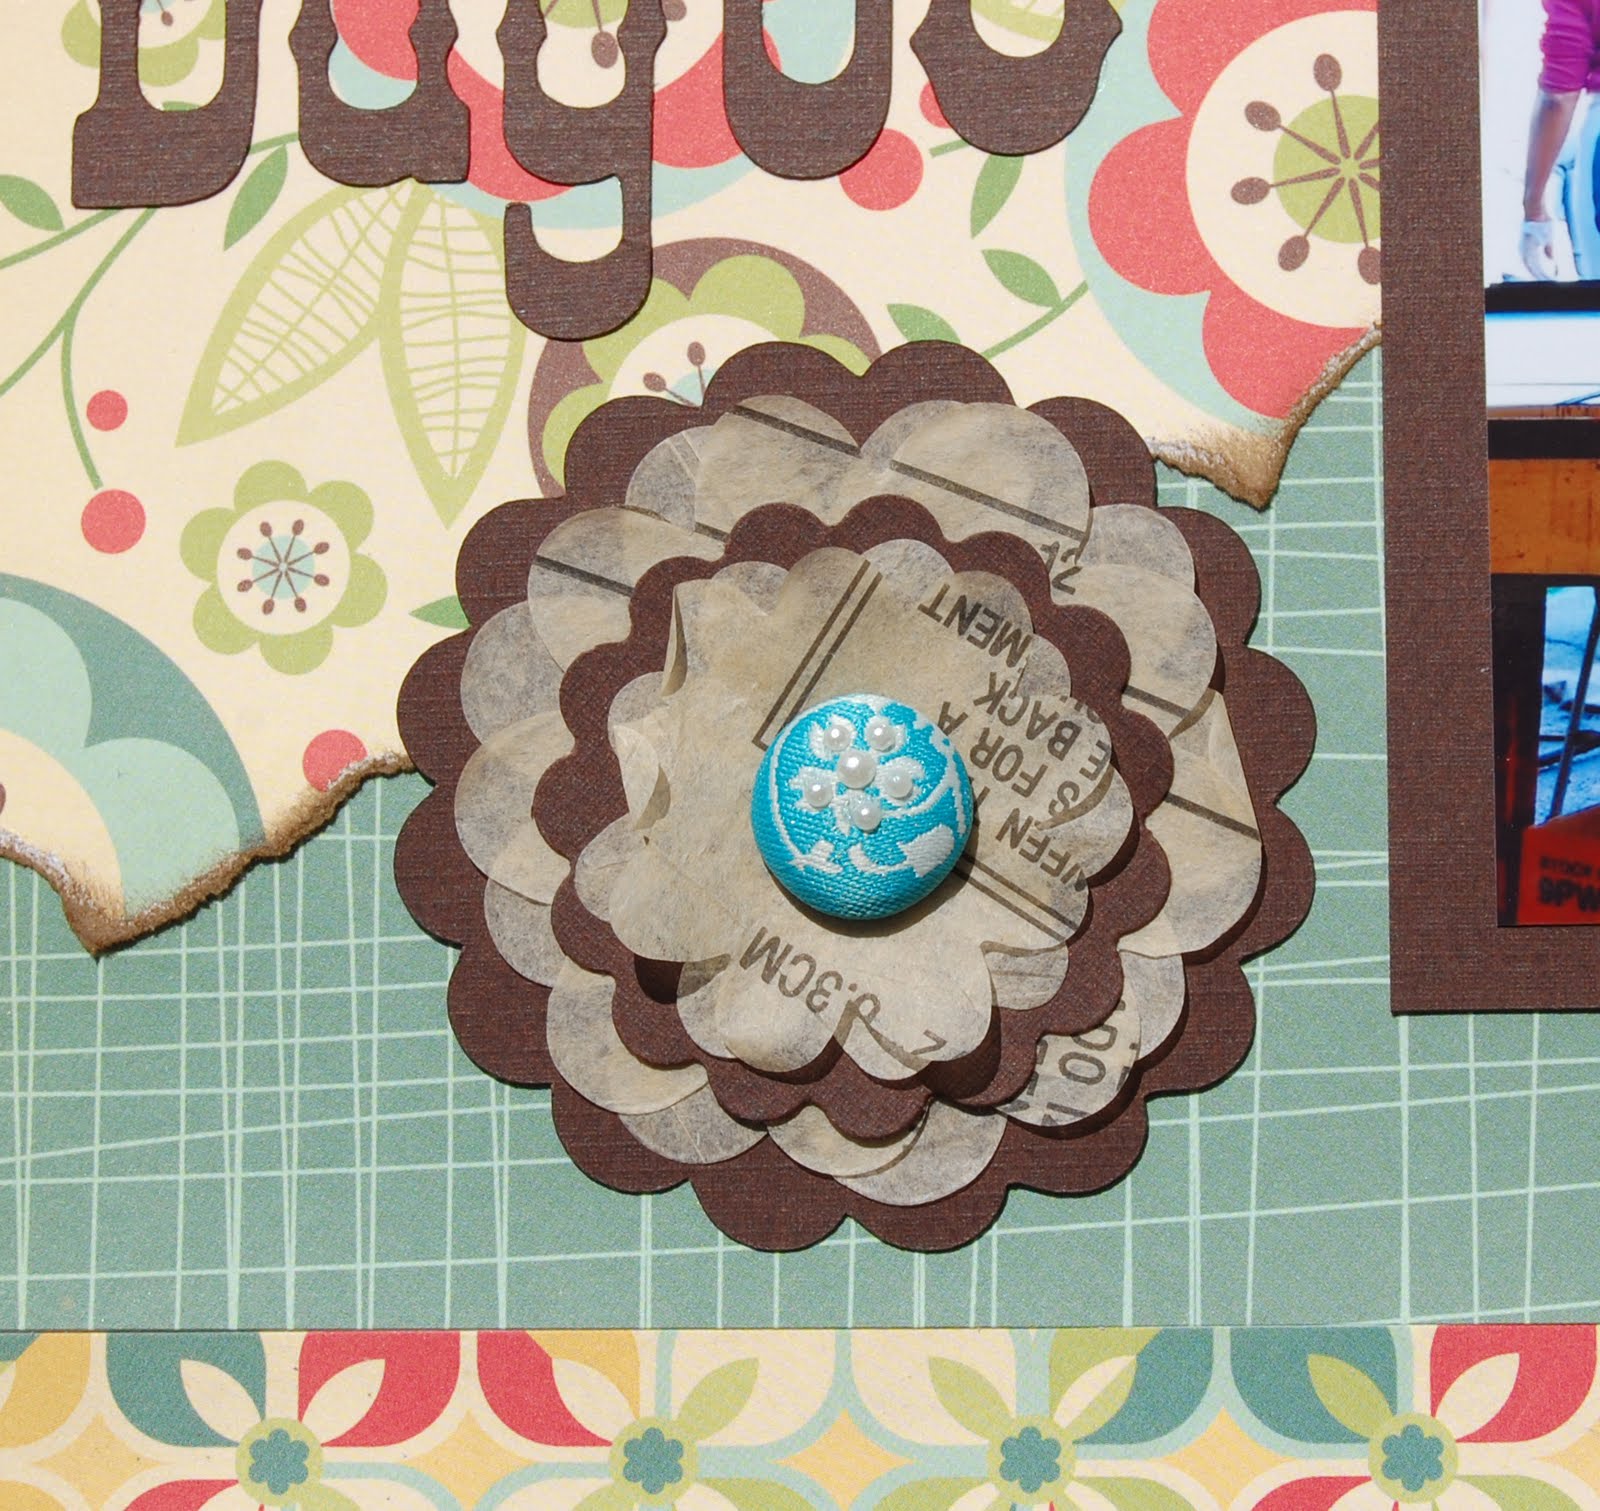
Here is a close-up of the spiral flowers I added to the layout. These are my new favorite thing to make right now. Simply cut out a circle with a punch or Cricut or even by hand. Then start at the outside edge and spiral cut into the center of the circle. Try to keep the sprial uniform but you can vary how wide you cut from flower to flower. These I tried to keep about 1/4" wide. Then start at the outer edge (where you started cutting) and roll the paper. That is the center of the flower. Keep rolling until you reach the middle! Then stick a Glue Dot on the center of the circle and adhere the spiral to it. I just love the look this adds!


I had so much fun creating this layout! The silver paper at the bottom was actually colored with Silver Smooch Spritz. This stuff is really fun for adding color to projects. I experimented a bit and tried it on black 1st but it was too dark for my layout so into the scrap pile it went for a card or something later. I was much happier with the results with the rest of my papers on the white card stock.


This last layout took me like a week to finish! It just didn't seem to want to come together for me. Where the orange bat paper is I had a completely different paper which I LOVE but just didn't look right. The bat paper is from a Target pack that I bought about 3 years ago. I didn't have much in my stash yet but they seemed so thin that they have just been sitting in my stash since then. But the orange really seemed to work for me and now I LOVE this layout! I used one of the fonts on Happy Hauntings for my title (I think it's called Creepy Font) cut out of orange glitter paper and of course I ended up matting all of my photos with the same paper. Here's a tip: If you're cheap like me and you don't want to "waste" glitter paper by matting photos with it, cut out the center before you stick it down! For this layout the border on the photos was about 1/4" around so I left it 1/2" wide all the way around. One of the mats you see was actually the center of the large mat! This is a GREAT way to stretch a sheet of paper. And yes, I only had ONE sheet of this glitter card stock.

So looking at all of these layout do you see a common paper? It's the super cute Halloween Words paper from Little Yellow Bicycle's Happy Halloween line (2009). I was lucky enough to WIN a super cute tote bag from LYB's Facebook page over the weekend and I thought I would share the love with my fellow scrappers! Leave me a comment here before August 31, 2010 at 11:59pm CST and you could win it! Send your friends and if they mention your name in their comment (and THEY are the winner) then you will BOTH win one (I have a 2nd one from CHA). If I can reach 100 followers before the end of this contest I will choose an additional winner for a special surprise blog candy too!!! One comment per person, additional comments will be disqualified. I will post the winner or winners names on September 1, 2010 and they will have 48 hours to contact me or I will re-draw the prize. Good luck!!!

Wednesday, August 25, 2010

So excited!!!

I just got notified that I was the Glue Dots Fan of the Week on facebook! Woo Hoo! I use Glue Dots to attach all of my flowers and buttons and anything else that just needs a little bit of good adhesive to layouts and cards! They are so easy to use and there is NO mess!!!

In this fun layout I used them to adhere my fun little embellishments to the lower right corner of this layout. The adorable baby is my cousin's sweet little girl on her 1st birthday... isn't she a doll? Thanks for looking!

Monday, August 23, 2010

Cherry Card

This card was so quick and easy to put together and you can tailor it to almost any occasion! The finished size is 5” x 6 1/2”.


I actually used scraps for both papers so my measurements aren’t exact but the brown cardstock was about 2 ½” x 5” so the cherry paper would be about 4” x 5”. The cherry paper is from the Close to My Heart line Cherry-O which I LOVE! I embossed the brown with my Cuttlebug D’Vine Swirl embossing folder. Then I used some Coffee Shop Glimmer Mist to add the shimmer to my brown cardstock. Then I chose 3 different Color Me Crazy flowers and sprayed the largest with Scarlet Glimmer Mist and the Small with the Coffee Shop Glimmer Mist and left the medium one plain white. Then I adhered everything to the from of my card as shown with my Scor-Tape and Glue Dots. Simple and easy and I could add a sentiment to the front depending on the occasion!


Cutters Creek Shopping List

Cuttlebug D’Vine Swirl
Coffee Shop Glimmer Mist
Scarlet Glimmer Mist
Color Me Crazy flowers
Scor-Tape
Glue Dots

Close to My Heart
Cherry-O

Thursday, August 19, 2010

SRM Stickers Sketch Challenge

Today on SRM Stickers Blog they have a fun card sketch challenge! If you enter you can win an SRM Prize Package of NEW Stickers!!!

For this card I used the SRM Quick Cards - Hugs sticker sheet! The Quick Cards stickers are perfect to make beautiful cards in a short amount of time! I think it took me longer to find the papers for this card than to put it together!
I think this card turned out really cute and I know just who I'm sending it to!

Sunday, August 15, 2010

I *heart* Echo Park Paper!


I had so much fun at CHA! Thanks again to Kim from Cutters Creek for inviting your Design Team members to tag along! One of the booths I was looking forward to seeing was the Echo Park Paper booth. They are a new paper company that uses some awesome color combos and patterns in their paper lines. If you act fast you may still be able to snag some of their papers on sale at Scrapbook Chicks HUGE 50% off sale... While visiting the booth I mentioned that I'm a Facebook fan of Echo Park and Madison gave me samples of Sweet Summertime, A Walk in the Park and Life is Good as well as a sheet of stickers from the brand new Happy Halloween line. I am in LOVE with this line, the colors are perfect and the stickers are so high quality! As a challenge for the Echo Park Papers Facebook page I created this 8" x 10" canvas wall hanging with a few of those stickers:


To color the canvas I used some Purple Pansy Glimmer Mist to spray the entire canvas. Next I used a few squirts of the Silver Smooch Spritz to add a kind of starry effect. Then I added the Haunted House and Moon from my Echo Park Papers Happy Halloween sticker sheet. Next I matted my photos with some orange card stock. Then I added the Trick-or-Treat banner sticker and the little stars and bat. Next I pulled out my 1/8" Scor-Tape to adhere my black eyelash yarn all around the border. Since it still didn't feel complete I grabbed my brand new i-rock tool from Imaginisce and added some black and silver rhinestones for a few more stars. After blinging it I was happy and now I can't wait to hang it up for Halloween...

Sunday, August 8, 2010

BLOG CANDY ALERT!

Just an FYI on a few blogs that are having some great giveaways:

BLOG HOP: You can start here: at Abby's Blog but you also HAVE to check out Laura's Blog it's part of the blog hop but she is giving away some AWESOME Blog Candy too!


Baby Album: Part 1


I have (finally) mailed off the baby album I created for my husband's cousin’s baby so I thought I could share it here now. In addition all of these GORGEOUS papers I used are on sale for 50% off RIGHT NOW at Scrapbook Chicks! All of the papers used to make this album are from Little Yellow Bicycle's Snuggle Bug Girl collection. The only thing not from LYB is the journaling spots. Those are by Making Memories and I thought the colors went nicely with the papers. To make this album I got out my Tags, Bags, Boxes and More Cricut Cartridge and cut the Bevel Tag with the Blackout feature on at 7 1/4" from all of my papers. I also cut 2 at 7 1/2" out of chipboard. Normally when I make one of these albums I use a piece of white cardstock as a base for each of my pages but the LYB papers are so think I didn’t need to. I just LOVE this paper! I decorated the album with various embellishments from the Snuggle Bug paper line as well as some stamps and some die cuts from the New Arrival Cricut cartridge. All of these photos are actually from a 2nd album I created to sell (except for the cover) so if you know anyone who is having a baby girl and you are interest in buying this album with a custom cover on it please contact me. On with the photos!


Baby Album: Part 2


Baby Album: Part 3


And here are the final pages of the album! I hope you've enjoyed my creation!