Background

Pages

Friday, August 10, 2018

Funny Cruise Shirts

Today I've got two more fun Cruise Shirts to share! The first uses a gorgeous pink glitter HTV on a very soft cotton tank top.


The shirt below uses the new Siser Electric HTV. It has this really great metallic sheen that is really hard to capture in a photo, but looks amazing in person!


I look forward to creating more shirts with fun specialty finishes on them!

Wednesday, August 8, 2018

Local Business Shirts

Today I'm sharing a fun shirt for a local business. They have a kid's club so each month a winning kid gets to pick a shirt color and number and they win a free personalize shirt!


For privacy I will just tell you about the back, we add their last name in a Varsity style font and their number, like a fun baseball shirt! I'm so thankful that I can team up with local businesses to create fun shirts! 


Monday, August 6, 2018

Cruise Ship Shirts

Today I wanted to share these fun shirts I made for my friend on her parent's anniversary cruise. I thought this was such a fun idea!


And it's also good to have you kid warning others too! I love the way these shirts came out!


Saturday, August 4, 2018

Burpees Sarcastic Workout Shirt

So I've also been working out to get myself in shape and of course I had to make myself some sarcastic workout shirts! Burpees are my most hated exercise, so I had to use this fabulous Coral Glitter Vinyl to make this shirt!


Now that I'm thinking about it, I think I need to put Sorry Not Sorry on the back.... because I'm NOT sorry, I really hate Burpees!


Thursday, August 2, 2018

Family Cruise Shirts

In case you can't tell, I've been making a lot of shirts lately! I'm hoping to play with some new paints soon, now that I'm caught up on my shirt orders!


These shirts are for a family who was cruising together to celebrate their parents/grandparents 50 years of marriage! So this is the fun design we created.


The shirts were all a light blue color and then the design is done with Navy Blue vinyl. The blues are hard to get right with my cell phone camera, but all of the shirts were the same color :)


I hope in another 33 years I can make fun shirts like this for my family to celebrate my 50th Anniversary!

Tuesday, July 31, 2018

BBQ and Pie Competition Apron Trophies

Today I wanted to share some fun custom aprons I made for my friend's church. They have an annual BBQ Competition and Pie Baking Competition and wanted something fun for trophies this year. So she asked me to design some aprons for the winners!


I'm a font-a-holic and I LOVE playing with them to come up with fun designs. This is what I created for the BBQ winner.


The Pie Competition winner walked away with this fun design! Again I got to play with fonts.


I had a lot of fun designing these aprons! Now to figure out what next years winner aprons will be!


Sunday, July 29, 2018

Third Birthday Shirts with Rainbow Holo Vinyl

I love designing fun shirts for special occasions and was lucky enough to get to make these fun shirts for a very special birthday girl and her family! Maggie turned 3 and her mom wanted to have fun family shirts to wear for her party. So we did a different Rainbow Dash on each person's shirts, and then did their name and a big 3 on the back of each shirt!


Because you don't really want to have multiple vinyl layers on shirts (they get thick fast) I needed to come up with a solution for making Rainbow mane and tails for the shirts. Happily I found this gorgeous rainbow striped holographic vinyl that I could fill in with!


The photos don't really do this gorgeous vinyl justice, it is so dazzling in the light! I had a lot of fun making these shirts, and I know the birthday girl LOVED her fun birthday shirt too! 


Friday, July 27, 2018

Clothes Pin Mermaids with Plaid Paints

Today I'd like to share just a few of the adorable Clothes Pin Mermaids we created at my Girl Scout Day Camp. If you want to see the awesome picture frames we made, check out this post! We used the fabulous paints that Plaid Crafts sent us for our camp, including Folk Art Acrylic Paint, Color Shift Paint and Glitteriffic. I'm so glad that I'm able to share my love of Plaid Crafts through my ambassador ship!


We did these on the first or second day of camp, which happens to be my busiest days with prepping for cooking and making sure camp is running smoothly so I only got a few pictures. I'm planning to make some more clothes pin dolls with my troops in the future though.


The mermaids were all so different and had such fun personalities! I loved seeing all the girls get their creative juices flowing!


Here's a list of the links for the paints we used:

Plaid Crafts Website
Folk Art Acrylic Paint
Color Shift Paint
Glitteriffic Paint

Wednesday, July 25, 2018

Getting Crafty at Girl Scout Camp with Plaid Paints

Every year in July I run a local Girl Scout Day Camp for about 100 girls. It's a ton of fun, and a ton of work, but it's a labor of love for sure! But when all of the planning turns out some really AWESOME creativity for the girls, it is so rewarding! This year, I was lucky enough to become a Brand Ambassador for Plaid Crafts. So they sent me some REALLY great products to play with!

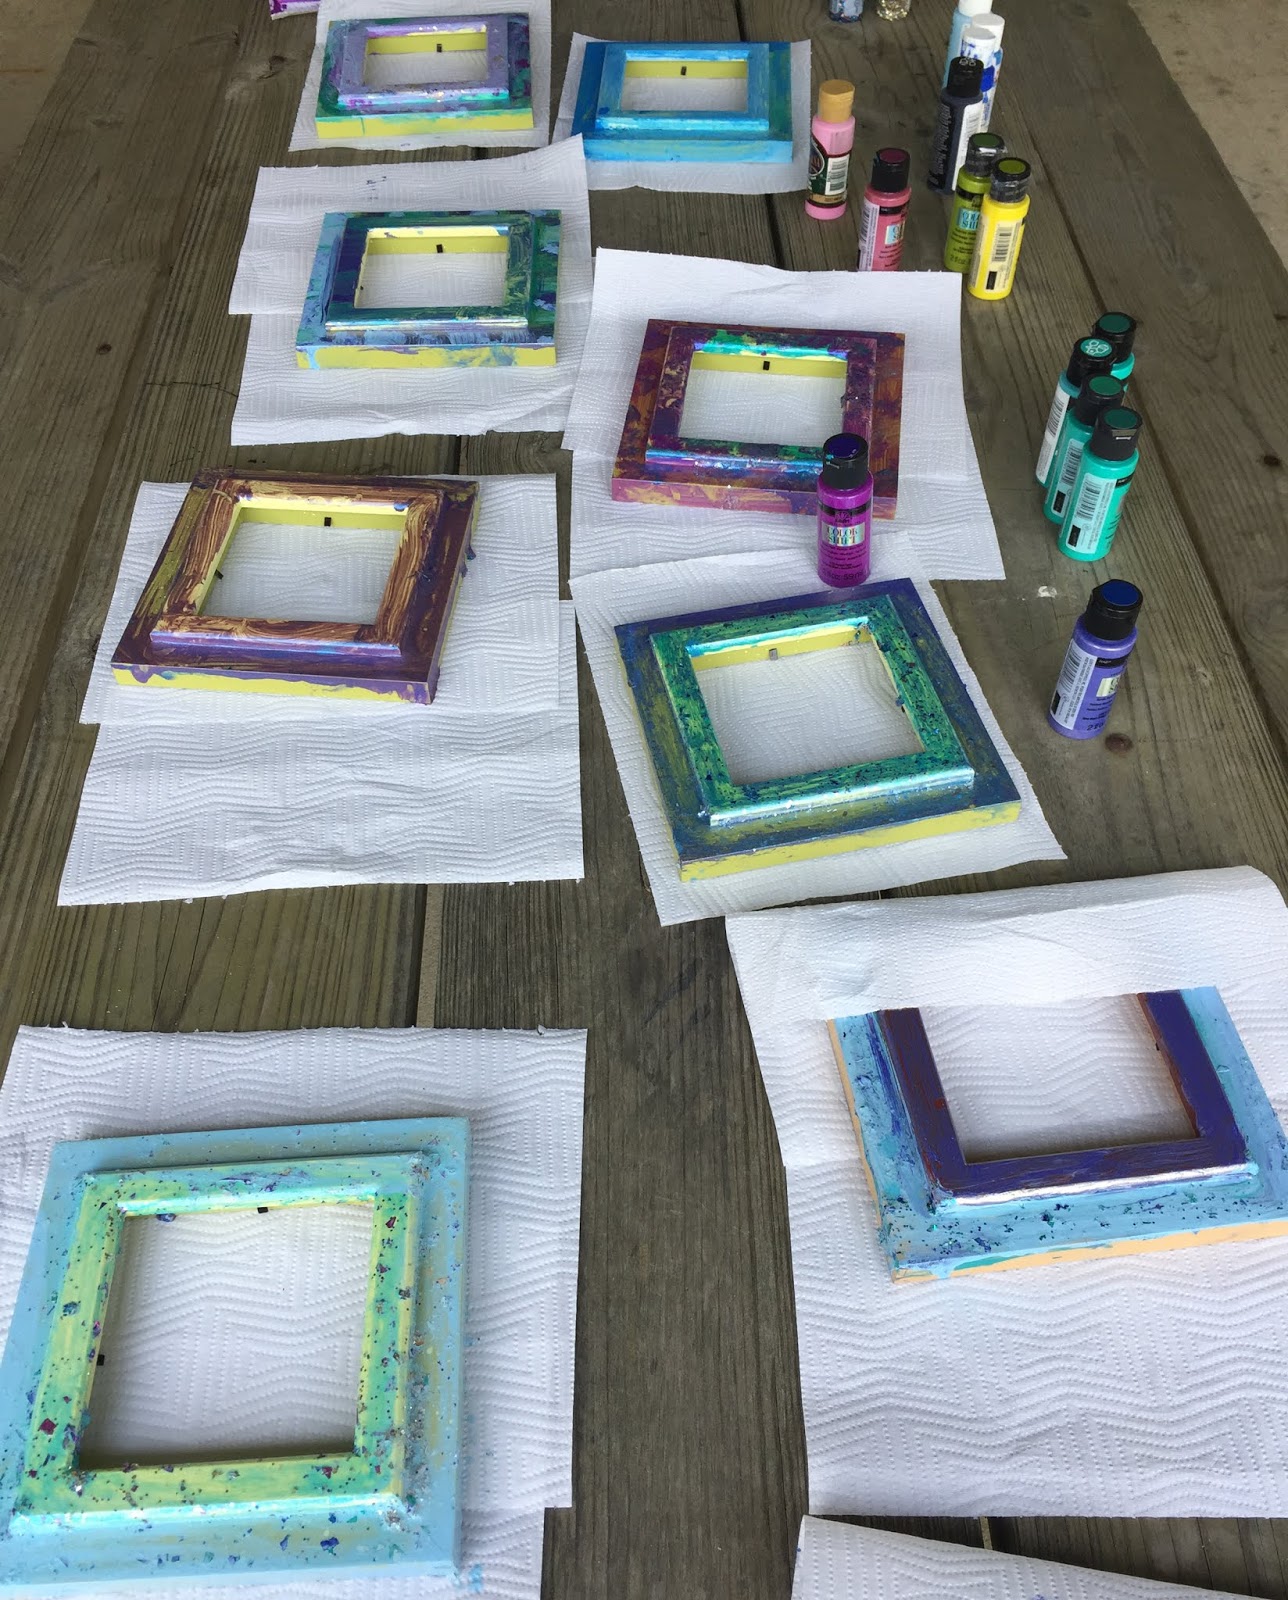
The first project we created with our Plaid Crafts paints were these fantastic picture frames!


Our theme for camp was "Under the Sea" so the girls had the option to add sea shells to their art. Some did and some chose to just use the paints and they are all works of art!


Plaid donated all of the paints and brushes that the girls used, so we used their beautiful Folk Art acrylic paint colors to decorate these frames.


I love the coverage we get with Plaids paints! You only need one coat for beautiful color and coverage!


Plaid also sent some of their AMAZING Color Shift Paints. Now, if you haven't see this in person, it's seriously one of my absolute FAVORITE paints! Just like the names says, the colors shift in the light!


We also paired up the Color Shift paint with the Glitteriffic paint for a metallic, glitter finish on some of the frames.


Here's a few more examples of frames the girls made! Aren't they cool?


This frame below used Color Shift and Glitteriffic in contrasting teal and blue for this gorgeous effect!


Here's a pic of some of the girls getting crafty with their frames! They all LOVED their finished frames and can proudly display a treasured photo in their new frames!


Links to the paints we used (some are affiliate links to Amazon):

Plaid Crafts Website
Folk Art Acrylic Paint
Color Shift Paint
Glitteriffic Paint

Friday, May 18, 2018

Today is National Mod Podge Day!!!!

Today is National Mod Podge Day!!!! 


So to celebrate this momentous occasion, Plaid is allowing me to give away a Mod Podge Prize Package to one of my lucky blog readers! 

What's in this FABULOUS package, valued at $50?


 -8 OZ. Mod Podge GLOSS
-8 OZ. Mod Podge Matte
-8 Oz. Dishwasher Safe Gloss
-Mod Podge Photo Transfer Medium 2 Oz. Carded
-Mod Podge Silicone Craft Mat
-Mod Podge 7 Piece Tool Kit
-Mod Podge 4pc Spouncer Set 
-Mod Podge 4pc Foam Brush Set 


WOW!!! That's a great package, I LOVE the Craft Mat so much to use with all of my Mod Podge projects! It makes clean up a breeze! So, how to you win??? Simply leave me a comment with your favorite ways to use Mod Podge and a way for me to contact you if you are my lucky winner by Sunday, May 20, 2018 at 11:59pm! The winner will be announced on Monday Morning! Thanks for stopping by!

Comment #4 was drawn as the lucky winner! I'll be sending you an email! Thanks!

Sunday, April 15, 2018

Crystal Palace DIsney Layout

One of my favorite character meals in Disney World is at Crystal Palace in Magic Kingdom. Not only is the food delicious, I get to see my favorite character - Eeyore!


I used another Scrapbook Generation Sketch for this layout and cut the title with my Cricut. I love that I'm able to weld all of my letters together to create titles like this so easily.

Friday, April 13, 2018

Disney Tiana Layout with Queen & Co Papers

Today is my youngest daughter's birthday and she's turning 9! So I decided to showcase this layout that I made with the Queen & Co Magic Collection! These photos were taken when she was 4 and she got to meet Princess Tiana at Magic Kingdom. I LOVED they way they interacted so much!


Since Evie was dressed as Rapunzel I decided to use the tower paper on this layout. I used another Scrapbook Generation Sketch for the photo placement but added my own twist to the paper placement. That's why I love sketches so much, you can use as much or as little as you like to make it yours.

Happy Birthday, Evie! Wishing you magic for all the years to come!

Wednesday, April 11, 2018

Spirit of Aloha Disney Scrapbook Layout with Photo Play Paper

Since I had already created a layout of my family enjoying this show, I decided to highlight all of the performers in this layout.


I found this amazing Scrapbook Generation Sketch that combined a ton of full sized 4 x 6" photos with a great collage of my beautiful Photo Play Papers. I again used the Rhapsody collection for this title page, and used my Cricut to write the title on my patterned paper! With a few simple embellishments and a little washi tape this layout came together really quickly!

Tuesday, April 10, 2018

Child's Desk Makeover

I've always wanted to try a Photo Transfer project but never had the right project to try it out on. When I got this little desk I decided to give it a try! I used Plaid Craft's Photo Transfer Medium to turn this desk into a beautiful display piece that my kids can also use. The wood desk top was transformed into a usable Chalkboard with Plaid's Chalkboard Paint. Both the paint and transfer mediums were very easy to use and made this project a great success!


I started by painting all of the metal pieces of the desk with a spray paint to refresh the metal. I just used plastic shopping bags and painter's tape to mask off the parts I didn't want to spray paint and then used a hammered bronze spray paint. Next I painted the top of the desk with several coats of the Chalkboard Paint, letting each coat dry fully in between. Once it cured for a few days I conditioned the paint by rubbing chalk all over it and wiping it off with a cloth.


 Then I made laser copies of my chosen scrapbook paper. This paper is from the Graphic 45 Primary Collection. I've been hording it for several years now so I was excited to use it with out using it all up! Because mine chosen papers had words I had the copies mirrored. I measured the area I was going to put my papers and then cut them down to size.


Next I applied the photo transfer medium in an even coat to the front of my images and then applied them to my desk.


I smoothed down the paper with a scraper tool to make sure it was evenly applied to my surface and wiped away any excess medium. Then I let everything dry for twenty four hours.


The following day I used a damp sponge to wet the paper, then waited 2 minutes and carefully used my sponge to rub the paper off of my image. I repeated for each image I applied.


I let everything dry again and then used sandpaper to distress some of the edges and sections of my transfer (I didn't want it to look too new).Finally I used some watered down brown paint to apply a wash of color to certain areas for an even more aged look.


And here's another angle of the finished desk! I love the way it looks and I'm planning to use it as an end table in my loft! I highly recommend giving Photo Transfer a try, it was so easy to do and gives a beautiful finished result. 

Monday, April 9, 2018

Disney Luau Scrapbooking with Photo Play Paper

Here's another Disney Layout that I made with the help of a Scrapbook Generation Sketch and some GORGEOUS papers from the Photo Play Paper Rhapsody Collection. If you haven't checked out Photo Play Paper yet, take a minute to visit their website HERE and check out all of their amazing collections.


I loved the colors on the Rhapsody Collection with my photos that I took of my girls at the Spirit of Aloha Dinner Show at Disney's Polynesian Resort. The food there was amazing and even though it rained the show still went on. We had a fantastic time!

Sunday, April 8, 2018

Beauty and the Beast Live on Stage Layout

Today I've got another Disney Trip Layout to share! This was another one that came together really quickly with the help of a Scrapbook Generation Sketch and some Jolees Stickers.


Beauty and the Beast is my favorite Disney Princess movie so I LOVED the stage show. I took about a million pictures of it, but managed to narrow the show down to my top 8 (it was HARD). I tried to find ones to showcase the plot as much as I could. I used a pretty simple pattern for the background to really highlight my photos. I also found this tickets die cut that I had in my stash and they were a perfect accent along with the Beauty and the Beast Jolees Stickers. For the title I put the sticker onto a white piece of cardstock and fussy cut around it. Then I added a little foam adhesive under it to pop it up like the layered Beauty and the Beast Image sticker.

Saturday, April 7, 2018

Quick and Beautiful Coasters with Mod Podge

So today I decided to post one of my daughter's crafty projects on my blog. She loves crafting as much as I do and she's always happy when I let her use all of my fun crafty stuff. So we were chatting and she asks me the best way to add some paper to these wood blanks that she bought and of course I said Mod Podge!


 So she got out the Mod Podge, the Mod Podge brushes, wood tiles, scrapbook paper and a gold paint pen.


First she applied the Mod Podge in a nice even layer over the wood tile and then applied her paper over the top side. She cut the paper to be slightly larger than the tile to make sure that it covered the whole thing. 


Once they were dry, she trimmed the excess paper away with scissors and then used a good old fashioned nail file to sand away any excess paper around the edges and corners. 


Because she wanted to use these as functional coasters, we decided she should use some Outdoor Mod Podge over the top of them to seal and protect them. The final step was to use the gold paint marker around the edges of the tiles to give them a great finished look! 


So here's the set of 4 coasters she created! They are beautiful and functional! It's amazing what kids will come up with when they are given the right tools to work with!