So you may have noticed a new little button over there in my side bar === >
I'm super excited to announce that I'm an official Ambassador for Plaid Crafts!
So in celebration, I want to share with you a fun event that I was able to take part of, and you can too! It's called Paint Along with Plaid Crafts and if you click right
HERE this link will take you to the Facebook Event for the Lucky Llama Paint Along Party. Now technically it was a live party, but you can watch the replay and paint along still too, which is what my good friend
Betsy and I did together!
To begin we each put all of these beautiful Plaid Paints into our palates. Following the instructions from our fabulous hosts we painted the background with this beautiful new Prairie Sunset color. You can find all of the supplies we used right
HERE and you'll SAVE a few dollars if you order before 3/31/2018. We mixed a bit of the Prairie Sunset with Titanium White randomly while the paint was still wet for a fun background.
Next we followed the instructions for sketching out the llama's body with our paint brush. It's surprisingly easy when they break it down into the basic shapes with you.
Then we continued to fill in our llama with paint and then used the gorgeous Metallic Rose paint to do the border. The border looks so complex but it's pretty easy. Four straight lines and then do the little dashes for leaves. Then add a little dot to the center of the leaves for more interest.
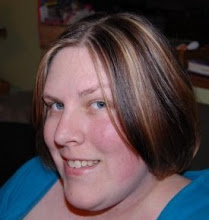
I had to throw in an action photo so you could see I actually painted this! LOL! I'm not an artist at all but I sure felt like one. Here I'm adding some of the details to my llama.
So my llama looks a little different from the one on the screen, but that's the fun of art. Nothing is perfect and you should put your own spin on things!
Here's a shot of the llama almost complete with some of his pom poms
added to his blanket and reins. It was SO easy to do with the Detail
Painters from Plaid. Seriously, I'm in love with them and know I'll be
using them in the future... especially in my paper crafting...
To finish off this adorable little llama we added my very favorite
product, Mod Podge Sparkle! Who doesn't need a little sparkle in their
llama? I love the glittery shimmer that Mod Podge Sparkle adds to my
crafts, with out the mess of glitter! Here we applied it pretty thick to
give some extra texture to our llama.
Here's my completed masterpiece, with all of the products we used to
make it. You could get by with just 2 - 3 brushes for this entire
painting, and see that green one? That's the Detail Painter! We used it
for all of the big pom poms. The small ones were done with the wrong end
of the paint brush.
I just had to include this photo of the Metallic Paints we used on this
painting, they are really gorgeous! It makes me want to paint everything
in beautiful jewel-toned metallic paint!
Here's one more look at our finished piece, with our Lucky Llama friend!
You never know what fun stuff Betsy is going to pull out when we craft
together...
And finally here are both of us with our masterpieces! I loved how they both turned out, the same and yet different!
I can't wait for the next Paint Along Party with Plaid. You can check out all of their great products at their webpage:
https://plaidonline.com/ and you can also get inspired on their Facebook Page:
Plaid Crafts Facebook. I can't wait to show you more amazing projects that I create with my favorite Plaid Crafts products!


