Background

Pages

Thursday, December 16, 2010

Hogs N Kisses Card

Today I want to share a quick card that I made. I'm going to send it to my husband's cousin, Heather, who is away at Boot Camp. She can only receive snail mail and I thought this would make her smile!


I used some American Crafts cardstock and glitter paper, Echo Park patterned paper, the Create a Critter Cricut Cartridge, my new Pink By Design Country Living stamps and, of course, my i-rock to make this fun card! Now to pop it in the mail!

Wednesday, December 15, 2010

Cream City Ribbon Blog Hop Winner

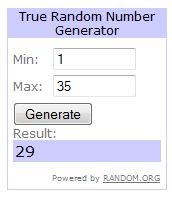
I just realized this afternoon that I never announced the winner of the Cream City Ribbon Blog Hop! The lucky commenter who was selected by Random.org was....


And after some careful counting...


Congrats, Bonnie!!! I sent you a message a few minutes ago. Make sure to send me your info ASAP! Thanks to everyone who checked out our hop!

Cutters Creek Poinsettia Card

This year I've been procrastinating mailing off my Christmas cards. I have no good reason, just haven't gotten it done yet. But I am still finding so many beautiful cards to inspire me! Have you ever really looked at some of the extra features on your cartridges? Unless they are fonts, I generally ignore them. But something on the Winter Woodland Cricut cartridge caught my eye... the Card Feature! I used it to make this stunning card:


I've had this cartridge for over a year and have made a few cuts with it here and there but never really thought about using the card bases. I really didn't know where to begin. I thought it would be nice if the layers were made to fit the card bases but I didn't see how to make them fit.... or could it be as simple as cutting the card and measuring the design? Couldn't be that easy, right? Well, it is! I cut my card base from the poinsettia cut on the Winter Woodland cartridge at 5". Then I used my Scor Pal to score my card.


Then I grabbed my Tim Holtz Design Ruler to measure the height of the poinsettia in the center of the card. It was about 3 3/4" tall so I cut the poinsettia at 3 3/4" with Real Dial Size off. Well, I looked at the cut that was way too small and turned Real Dial Size ON and tried again. Perfect fit! The cut normally has a set of leaves with it that aren't on the card front so that is what happened. Anyway, I didn't toss that 1st cut, I decided to layer it on top of the other one after I distressed them both with the Tim Holtz Frayed Burlap Distress Ink. I also cut the center of the flower at 5" (Real Dial Size OFF). Before gluing anything down though I pulled out a roll of packing tape and some clear micro beads that I've had unopened forever.... you could also use glitter for the same effect. Now, laid my card face down on my Bazzill Splat Mat (make sure you have a non-stick mat and NOT paper under your card) and carefully tore a strip of packing tape (don't get your fingerprints on it) and stuck it to the back of my design. You will need 2 strips to cover the whole opening, one strip for each side. Then pull your card up and add your beads or glitter to the sticky part. I love the stained glass effect my transparent beads created here.


Once it's totally covered I used my Zip Dry Glue to adhere my large poinsettia flat to the card base. Then I used some Pop Up Dots to attach the smaller flower after bending the petals a bit for more dimension. Then I used the Pop Up Dots cut in half to pop up the flower center. Finally to finish off my card I used my Crop-A-Dial to punch a hole about an 1" from the top and bottom along the score line and tied a ribbon through the holes. The directions seem like a lot but it took me about 15 minutes to whip up this card and I think it is so pretty!

Shopping List:
Winter Woodland Cricut Cartridge
Scor Pal
Tim Holtz Design Ruler
Tim Holtz Frayed Burlap Distress Ink
Bazzill Splat Mat
Zip Dry Glue
Pop Up Dots
Crop-A-Dial

Monday, December 13, 2010

Red & Green Blog Hop Winner!

I just wanted to say Thank You too all of the wonderful people who stopped by my blog this weekend! I really enjoyed reading everyone's comments! I also want to thank Kim at Cutters Creek for sponsoring all of our blogs with great prizes. This is just the beginning for tons of fun coming up at the Cutters Creek Design Team Blog! Make sure you keep checking there for new projects and inspiration. In January we are going to start some new challenges and other fun stuff so I hope you will play along with us!

Now with out further ado.... the winner of my Blog Candy, the Cuttlebug 5X7Christmas Countdown Embossing Folder is......


Comment # 14!!!! Congrats go to Bonnie who said:


Bonnie, there was no e-mail address in your profile so I left you a note on your blog. You have 48 hours to claim your prize or we will redraw a name! Thanks again to everyone else who stopped by!!!

Saturday, December 11, 2010

Cutters Creek Red & Green Blog Hop

Welcome to the Cutters Creek Red and Green Blog Hop! Our wonderful design team members have all created some fun Christmas projects to inspire you! The only requirement for the projects were that they must contain Red and Green. You just saw Chris' fabulous project on the Cutters Creek Design Team Blog . Your next stop along the hop will be Laura's Blog . If you are just finding our hop please head over to the Cutters Creek Design Team Blog to start from the beginning. There are 8 inspiring projects for you to check out as well as 8 chances to win a great prize from Cutters Creek! Here is the project that I have created for today's hop:


I have been seeing a LOT of banners lately. They are definitely a fun trend! I've been wanting to make one of my own so I thought I'd give it a try. When I first saw the Country Life Cricut Cartridge I wasn't sure it was one I really "needed". Truthfully I'm not much of a country girl. But then I saw the banner font! For my project I used the Scalloped Banner base cut at 10 1/2". Then I chose a plain blank banner for the patterned paper. You can actually cut this layer with the letters in it but I wanted a little fancier font. My patterned paper is the Merry Christmas line from Echo Park Paper. For the letters JOY on my banner I used the Ashlyn's Alphabet Cricut Cartridge and cut my letters at 4" tall with the Block feature on from Ruby Slipper Bazzill Cardstock. Next I embossed each letter with my Cuttlebug folders. I used Argyle for the J, Swiss Dot on the O, and D'Vine Swirl on the Y. Before I began gluing I laid out everything on my Bazzill Splat Mat and grabbed my Tim Holtz Ink Applicator and some Tim Holtz Walnut Stain Distress Ink to distress everything. I started just off the edge of my papers and swirled along the edge for that nice aged look. On the letters I lightly swirled the whole letter to highlight the embossing.


Next I had to decide what little extras I wanted to add to my banner pieces. I knew I wanted to try one of Tim Holtz's tissue tape flowers that I saw on one of his 12 Tags of Christmas blog posts. I inked the tissue tape with more Tim Holtz Walnut Stain Distress Ink buy unrolling about a foot of the tape and sticking it to my Bazzill Splat Mat. I inked it and then rerolled it onto the roll to make it easier to create the flower. I adhered it around a 1 1/2" circle that I punched from scrap paper then backed it with a pretty scalloped circle that I cut from Sentimentals at 3" and distressed. I created the center brad with my i-top tool and a medium brad daddy. Next I cut the cute little cardinal from the Winter Woodland Cricut cartridge at 2" and adhered him below the J.


To make the snowy tree branch, I again used the Winter Woodland Cricut cartridge and cut the branch at 2". I swirled the edges with my Tim Holtz Walnut Stain Distress Ink again and used a little extra on the pine cone to make it stand out a bit more. I highlighted the details on the pine cone a bit more by using a brown pen to highlight the U-shapes in it. After I adhered it to the banner with Quickie Glue Roller Pen I added some White Liquid Applique. Now, the bottle says to let it dry overnight but I'm just not that patient and I LOVE the bumpy, snowy texture that it gets when you heat it wet. After it dried I then added some Diamond Stickles for an even snowier look.


I used the Christmas Cheer Cricut cartridge, which is an oldie but still one of my favorites, to cut the stocking at 3". I again used the White Liquid Applique to make the toe, heel and cuff of the stocking textured. Then I tied it on to the bottom of my Y with a bit of white embroidery floss. I added another strip of the Tissue Tape to the top of my banner piece after I distressed it. To adhere all of my pieces I used my Tombow Mono Adhesive Runner and my Quickie Glue Roller Pen. After it was assembled I decided I needed a bit more bling so I outlined all of my letters with the Diamond Stickles. I added some silver eyelets to the banner holes to make them a bit stronger with my Crop-A-Dile. Then I used some red velvety ribbon from my stash to string my banner together. I tied all the little bows separately and used the Tim Holtz Tiny Attacher to add them to the ribbon.

Now for the good stuff: BLOG CANDY! I get to giveaway the Cuttlebug 5X7Christmas Countdown Embossing Folder to one lucky commenter!


Please leave me a comment and let me know about a favorite gift you've given, for Christmas or any time. Comments left up until 11:59pm on Sunday December 12th will be eligible to win. All winners will be selected Monday and posted on each blog so make sure you check back to see if you have won! You will have 48 hours to respond before we choose another winner.

Here is a list of all the blogs in the hop in case you get lost along the way:
Cutters Creek Design Team Blog
Mandie's Blog (you are here)
Laura's Blog
Melissa's Blog
Sandi's Blog
Kim's Blog
Vicki's Blog
Lori's Blog

Friday, December 10, 2010

Reuse, Recycle, & Ribbon Blog Hop

Welcome to the Reuse, Recyle, & Ribbon Blog Hop! If you've arrived here from Nikki at Nikki, In Stitches you're in the right place! I'm so glad you could join us today. The seven of us bloggers were brought together by a new ribbon company called Cream City Ribbon and many of our projects will feature their product. We also reused and recycled as much as we could, and I'm sure there will be some holiday fun thrown into the mix, too! Cream City Ribbon is produced from renewable, biodegradable cotton fiber, grown and processed responsibly in the USA with water based dyes and without chlorine bleaches.


I'm sure just by looking at my project you can't guess the recycled element... you know the board that is at the back of notebooks? I recycled it from a couple of old notebooks to create this picture frame. The frame is cut from the Happy Hauntings Cricut cartridge at 5 1/4". I colored the edges with a green Bic Mark-It marker and then covered the front with a sheet of Everybody Loves Christmas from Echo Park Paper. Then I added a thin layer of the FolkArt Extreme Glitter Paint in Silver. I LOVE the sparkle this paint added and I know I will be using it a LOT more in the future! I covered the back parts of the frame with plain white cardstock. Then I made the red loopy bow with a bunch of mini Glue Dots and my red Cream City Ribbon.


I used few foam Pop-Up Dots to adhere the little blue bird sticker to my frame. Then I pulled out my Imaginisce i-rock tool and my compact of rhinestones and blinged up my frame! I'm so thrilled with how it turned out! I added a cute photo of my daughter trying to play the piano at Christmas a couple years ago.

Oh, did I mention... I'm giving away some blog candy??? I'm sure after learning about this new ribbon you would like to try some too! Well, Cream City Ribbon was very generous when they gave me some ribbon and I would like to pay it forward to one lucky commenter! Just leave me one comment about my project and make sure I have a way to get a hold of you and you will be entered to win. If you like my project, I'd love if you would also become a follower of my blog, but it's not required to win. After you leave your comment hop on over to Grace at Grace's Scrap Attic and check out her project!

Here's a list of all the blogs in the hop in case you get lost along the way:
Nikki at Nikki, In Stitches
Mandie at Mandie's Scrappin' (you are here)
Grace at Grace's Scrap Attic
Kim at Kreative Krafts
Meighen at Scrappin_3rdeeschik
Chris at Turned Gypsy
Tracey at The Cropping Canuck

Thursday, December 9, 2010

Cricut Circle Challenge #10: Holiday Recipe

Every family seems to have a favorite holiday recipe or two. For this weeks Cricut Circle challenge project the objective is to create a project that is about, includes, or holds a holiday recipe. This could be a scrapbook page, a mini album, a recipe box or book, a Gift for a Neighbor . . . the sky’s the limit. Project must be newly created for this challenge and must include atleast 2 different cuts from any Cricut cartridge to qualify. This challenge is open to Cricut Circle Members only.


I used my Cricut Imagine and the Kate's Kitchen cartridge to create this adorable recipe card. I cut the card at 4". Then I printed a full sheet of the green patterned paper with my Imagine. I cut it down to the size I wanted and glued the recipe card to in. Next I cut this cute little spoon also from Kate's Kitchen and added him to the card. I wrote out my yummy brownie cookie recipe and added a little curly ribbon at the top!